Hey, everyone! I am heading to the Haven blog conference in Atlanta in a few days and I am super excited! At the Haven blog conference I will get to meet some of my blog role models like Sarah of Thrifty Decor Chick, Beth of Home Stories A to Z and Rhoda of Southern Hospitality. So today I am sharing how I put my blog media kit together for the conference!
Besides giving me the chance to meet some of my favorite bloggers, the conference will give me the opportunity to introduce Mom Home Guide to brands like Home Depot, Moen and Rust-oleum. I won the trip through the NRG Residential Solutions Learn & ConserveSMBlogger Challenge.
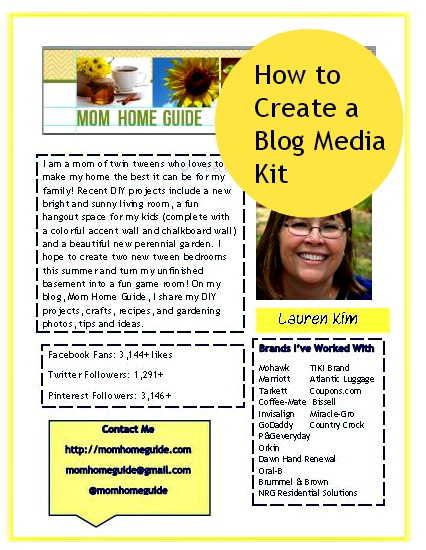
Since the conference will be a great chance to build relationships with some really great brands, I put together a Mom Home Guide media kit to bring with me and present to brands — I’ve read that blog media kits are a must have for any blog conference. Media kits are like a snapshot of your blog and give brands and PR companies a quick idea of who you are and what your blog is about!
What to Include in a Blog Media Kit
I’ve done a lot of research from other bloggers about what to include in a blog media kit, and these are the basics:
– Blog logo or header
– Your name and headshot
– Blog statistics (for my stats, I included my Facebook fans and Twitter and Pinterest followers)
– Brands you’ve worked with
– A blurb about your blog.
How to Create a Media Kit

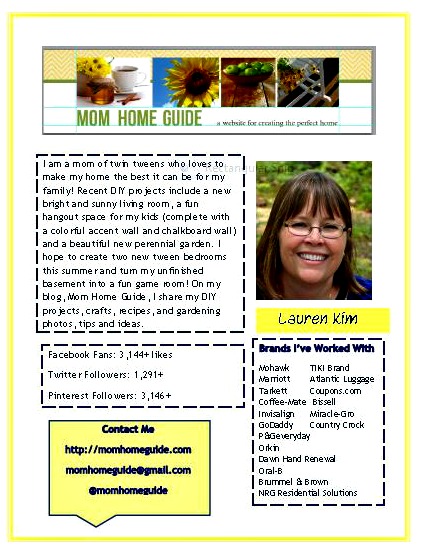
Mom Home Guide’s Media Kit (click here for a PDF)
Since I don’t have a lot of design skills or a lot of time to work with, I put my media kit together with Microsoft Word. To start off, I simply right-clicked on my blog’s header (the header is the image on top with the blog name) and saved it as an image on my computer. I then opened a new Word document, and pasted my blog’s header at the top. Easy!
I then used the Insert tab in Word to add text boxes for my main elements: My introduction paragraph, my blog’s statistics (Facebook fans, Twitter followers and Pinterest followers), a box with my contact information (email address, blog URL and Twitter username) and another box that notes some of the brands I’ve worked with.
I also added my headshot from my blog and inserted another text box to add my name underneath. To make the text box in yellow, I used the Text Fill option under the Format tab. I was lucky that my daughter (who’s 11) was on hand to help me — she knows how to use Word’s design features way better than I do! (Thanks, honey!)
My media kit is fairly simple, but I like the way it turned out. What do you think? Hope you like it! If you have a media kit for your blog, I’d love to see it!

Lauren, this is fabulous! I’d love to create a hard copy media kit of my own and I’m pinning this to use as a guideline. I’d love to hear all about the conference – I’m hoping to make it to one in September (my first).
Hope this tutorial helps, Jen! What conference are you going to in September? Thanks for stopping by!
Thanks for sharing this helpful information (especially for a beginner blogger like me)!
You’re welcome — thanks for stopping by, Janna!