Thanks to BurlapFabric.com for sponsoring this post. I was provided with burlap product in exchange for my honest review. This post contains Amazon affiliate links. If you click on a link and make a purchase, I earn a small commission that helps to run this blog. Thanks!
Welcome back to 12 Months of Wreaths!
Today I’m sharing an easy DIY burlap bubble wreath tutorial. My blogging friends are sharing awesome wreath tutorials, too!

Carrie Curly Crafty Mom Blog | Facebook | Pinterest | Instagram | Twitter | Bloglovin’
Lauren at Mom Home Guide Blog | Facebook | Pinterest | Instagram | Twitter | Bloglovin’
Victoria at Dazzle While Frazzled Blog | Facebook | Pinterest | Instagram | Twitter
Easy DIY Burlap Bubble Wreath

Follow your Hosts and Co-Hosts:
Lauren at Mom Home Guide Blog | Facebook | Pinterest | Instagram | Twitter | Bloglovin’
Victoria at Dazzle While Frazzled Blog | Facebook | Pinterest | Instagram | Twitter
Burlap Bubble Wreath Materials

1 roll of ivory stripe faux burlap ribbon
There’s good news! If you’d like to make this wreath, you can use the coupon code, 5MOMHGUIDE, and get $5 off a $5+ purchase at www.burlapfabric.com.
How to Make a Bubble Burlap Wreath
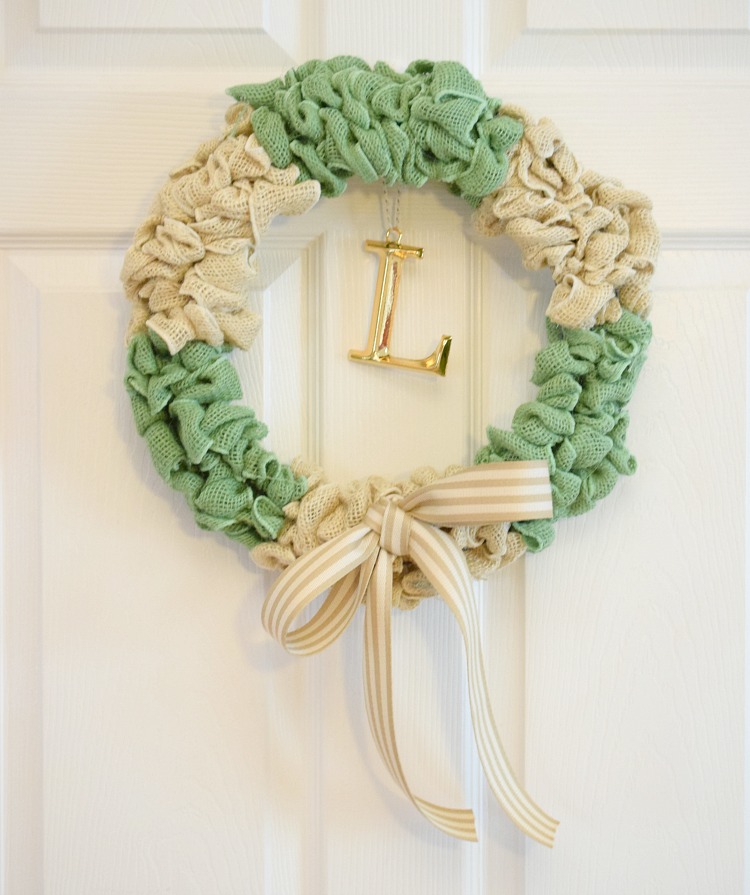
To make my burlap bubble wreath, I used alternating colors of burlap ribbon to create blocks of color in two colors. (White and green)
I started out by tying on a piece of green burlap on the back of the wreath form. I then pushed the burlap through a section of the wire wreath form to the front to create a “bubble,” or loop. Once I had a loop, I twisted the burlap ribbon behind the wreath form to secure the burlap bubble. (The twists on this wreath are what keep the “bubbles” in place.)
Once I had the burlap secured by twisting it, I pushed more burlap through to create another bubble. I then twisted the ribbon again on the back of the wreath. Once I had created a few “bubbles,” I pushed the bubbles tightly together. I kept making bubbles of the same color until I reached the end of one section of the wreath. (The wreath form I purchased is separated into segments by horizontal wires.)

When I got to a new section, I repeated the same steps above with the white burlap ribbon. When I filled that section of the wire wreath form, I switched back to the green burlap ribbon.
The below photo shows how to create a burlap bubble.

I continued, creating alternating green and white burlap ribbon sections.
Once my wire wreath form was filled with burlap bubbles, I used the ivory stripe faux burlap ribbon to tie a simple burlap bow. (I tied the bow in a way similar to how you would tie your shoes.) I secured the bow with just a dab of hot glue from my glue gun.
Then all that was left to do was hang the wreath on my door! At first I hung it in my family room on a white door.

Eventually I moved the wreath to my home’s red front door, where it now hangs with my family’s “K” monogram.

I might have to make another one of these wreaths because I also love how it looks against the white door with the gold monogram (for my first name) that my friend, Carrie gave me!

Thanks again for joining us! We will be sharing a new wreath once a month in 2017!
Are you interested in sharing a wreath with us one (or more) months? We are accepting guest hosts! Email carrie (at) curlycraftymom (dot) com if you are interested!
This tutorial has been shared at the Homestyle Gathering party at My Wee Abode.
Discover more from momhomeguide.com
Subscribe to get the latest posts sent to your email.
I love how your wreath turned out! The inital is such a cute touch!
Jill
Doused in Pink
I love this neutral colored wreath, Lauren with the tans and greens! So pretty! And such a cute little bow and monogram, too!
Carrie
curlycraftymom.com