A few years ago, I created a gallery wall of family photos along the wall that runs next to our home’s staircase to our second story. Our home’s stairwell is a great place for a gallery wall since it’s the first thing you see upon entering our home. I started the gallery wall when my kids were little, and I’ve added to it bit by bit—which resulted in a layout that was a bit chaotic. I recently got a very cool Cigman CM-S02 level—which is an awesome tool for all sorts of DIY projects—so I decided to finally make the layout of the gallery wall more orderly. Plus, now that my kids are older and have graduated college, they’ve been wanting me to update some of the wall’s photos. So that’s given me added incentive to improve the wall.
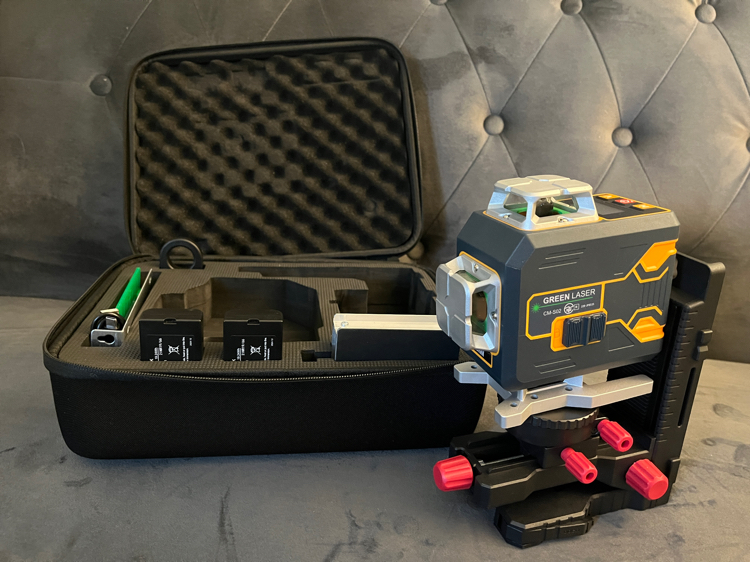
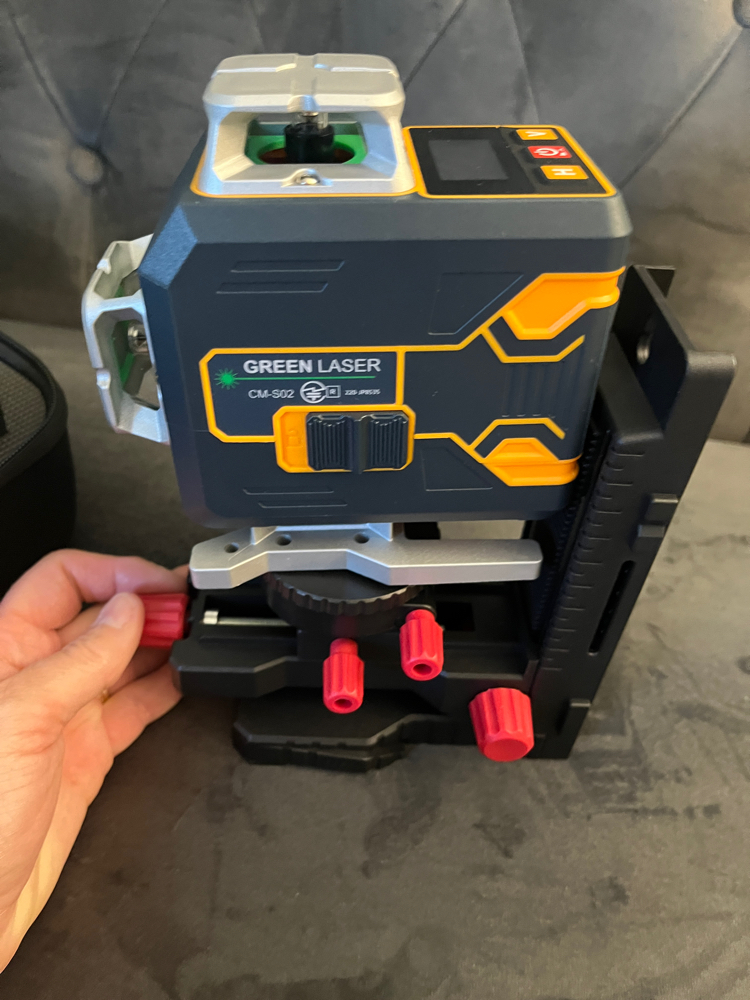
Cigman CM-S02 Laser Level
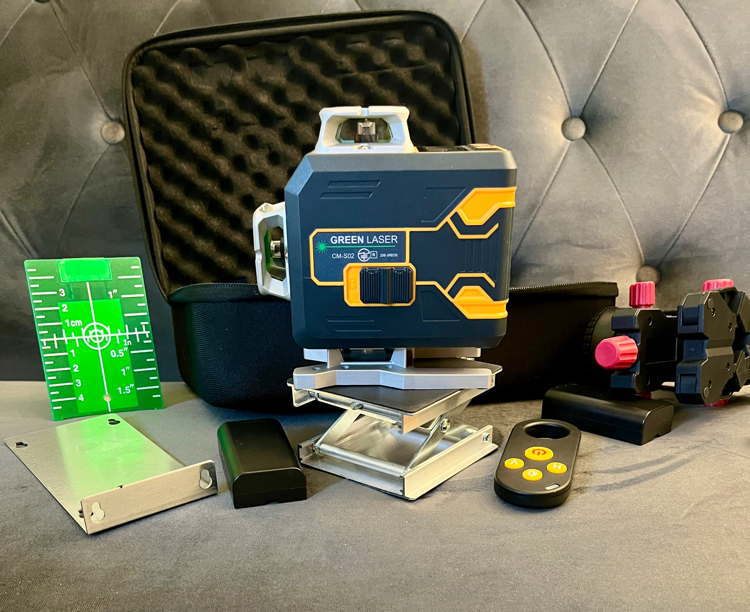
My Cigman laser level comes with an extensive set of accessories. Included are two chargeable lithium batteries, a charging cable (without plug), a multi-functional magnetic mount (with metal plates), a lifting base, a target plate, and a remote control. This full laser level kit will ensure that I have everything I need for all my projects. I love that it also includes a very sturdy case with lots of padding to protect the laser level and its accessories. I am quite sure it has everything I could need for completing my gallery-wall project.
The laser level has two horizontal lasers and two verticals, with the option of turning off ones you don’t need if desired. In addition, the Cigman CM-S02 Laser Level has an LCD screen and can be operated via both its remote and app, which is very handy!
How to Arrange a Stairway Gallery Wall
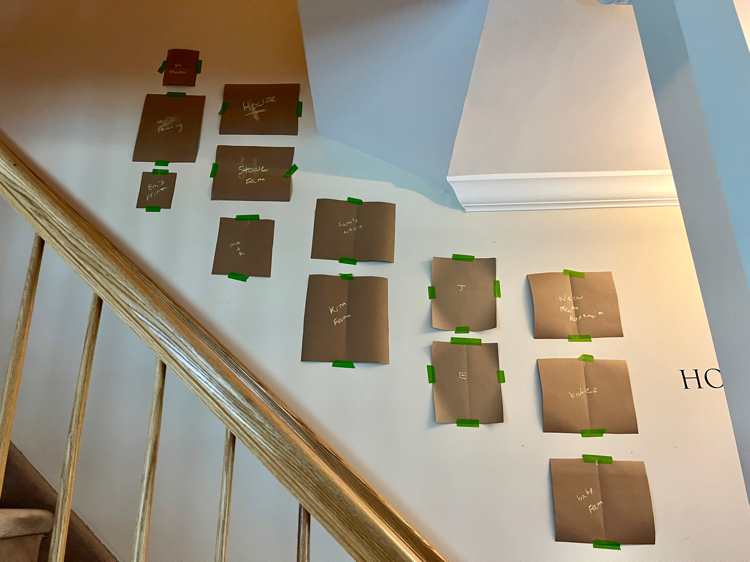
For the first part of my gallery wall project, I created a paper mock-up using simple DIY tools: brown craft paper, scissors, a yardstick, and painter’s tape. I cut a piece of craft paper to match the size of each frame, then played around with their arrangement on the wall until I found a layout I liked. I also folded each frame template in half so I will know where each’s exact center is when it comes time to hang my frames. On each template, I noted with chalk which framed photo it represents—just in case I forget!
I decided that I wanted to arrange the frames in vertical columns with each photo spaced 2.5 inches apart vertically. I placed the vertical rows 5.5 inches apart from each other and taped my templates to the wall with painter’s tape. I like how that how I have spaced the framed photos out better, our gallery wall fills more of the wall that runs behind our staircase. I think keeping to uniform spacing between each frame and each row helps to provide an orderly look to the gallery wall.
I also added a few items to fill out the gallery wall—I included a colorful drawing that one of my kids made of our home, plus an artistic print she made of her former apartment’s sitting room. The room was really pretty! I also included a 5×7 print of one of my favorite photos of our pup, since I felt like the wall needed something small to fill an empty space in my gallery-wall layout.
Now that I have the template up for the gallery wall, I can take some time to learn how to use my new laser level—I have never used one before but have always wanted one since I am always working on DIY projects in my home. I also figure that my new level will help me to get the frames hung straight and evenly.
Be sure to check back to learn how to use my new Cigman laser level and to see my finished gallery photo wall!
This post contains Amazon affiliate links.If you click on an affiliate link, I will earn a small commission that helps to fund this blog. Thanks!
Discover more from momhomeguide.com
Subscribe to get the latest posts sent to your email.
[…] house feels special when it reflects the personalities within it. If you display family photos in hallways and place heirlooms where they can spark conversation, you can turn any house into a […]