

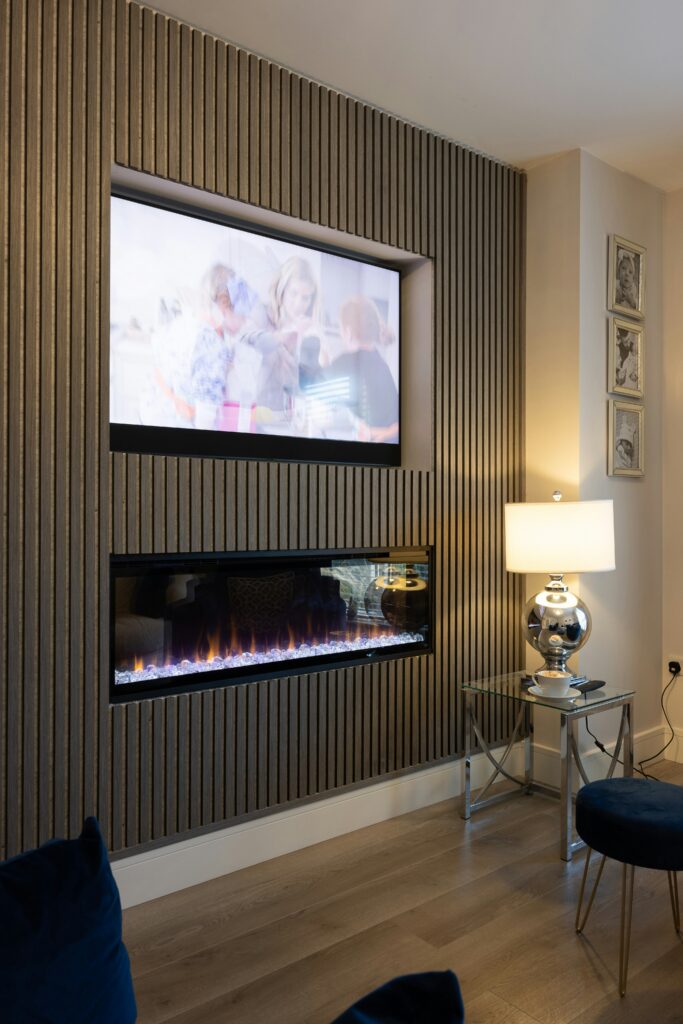
Slatted walls have become one of the most popular decorating trend to add warmth, texture and rhythm to an interior, whether in a living room, a hotel lobby or a busy open-plan office. If you are planning a project that features slatted wall panels, a little preparation goes a long way. The right tools, a clear plan and an awareness of the most common pitfalls will help you achieve a clean, professional result rather than a wall full of uneven gaps and wobbly lines.
This guide walks you through what you need to know before you start, the tools to have on hand, a step-by-step installation process and the mistakes that trip up many first-timers.
Know Your Panel System Before You Start
Not all slatted panels are installed the same way, so read the manufacturer’s instructions before you buy a single screw. Broadly, panels fall into two groups.
Many residential products are standard-sized panels, often wood or wood-effect slats bonded to an acoustic felt backing, designed to be cut to length on site and fixed with screws, adhesive or both. Commercial systems, on the other hand, are frequently manufactured to bespoke sizes for a specific project and supplied ready to fit, sometimes with concealed fixings and built-in provision for lighting, ventilation grilles or access hatches. With these made-to-measure systems, on-site cutting is usually unnecessary and may even be discouraged.
Fire performance matters too, particularly in commercial, public and multi-occupancy buildings. Wall linings are classified for reaction to fire under the European standard EN 13501-1, and some panel systems are tested as complete assemblies. Altering a fire-rated panel, for example by cutting it or swapping its backing, can affect its tested performance, so always check what the manufacturer permits and what your building’s fire strategy requires.
Tools You’ll Need
The exact kit depends on your panels and wall type, but a few essentials cover most installations. For marking out, you will need a tape measure, a pencil and a spirit level or, ideally, a laser level, which makes it much easier to keep long runs straight. A stud finder or detector helps you locate timber or metal studs and avoid hidden cables and pipes.
For fixing, a drill/driver with bits suited to your wall, along with the correct screws and wall plugs, is essential. If the manufacturer recommends bonding as well as mechanical fixing, add a caulking gun and the specified panel adhesive. Where your system is designed to be cut on site, a fine-toothed or circular saw will trim the slats cleanly, while a sharp utility knife deals with any felt backing.
Don’t overlook safety. Safety glasses, a dust mask for cutting and a stable step ladder should all be part of your kit.
Step-by-Step Installation
Start by acclimatizing the panels. Timber and wood-based products can expand or contract with changes in temperature and humidity, so if the manufacturer recommends it, leave them in the room where they will be fitted for the specified period.
Next, prepare the wall. The surface should be clean, dry, sound and as flat as possible, with loose paint or wallpaper removed and any significant holes filled. Use a detector to check for cables and pipes, and mark the positions of sockets, switches and any lighting or ventilation the panels will need to work around.
With the wall ready, plan your layout. Measure the full width and work out how the panels will finish at each end. Starting from the center and working outwards often gives a balanced look, with equal-width cuts at both edges.
The first panel is the most important one. Use your level to make sure it is perfectly vertical, because every panel that follows takes its line from it. Then work across the wall, fixing each panel tight against its neighbor in line with the manufacturer’s spacing and fixing guidance, and checking the level every few panels.
For cut-to-fit systems, measure twice and cut once around sockets and switches. With made-to-measure systems, these openings are normally built in at the factory. Finish by adding any trims or end pieces the system includes, then clean away dust and pencil marks.
Tips for a Professional Finish
Order a little extra material on cut-to-fit projects. Allowing roughly 10% for waste and mistakes is a common rule of thumb, and it saves the frustration of waiting for a second delivery that may come from a different batch.
Think about lighting early. Slats create strong shadow lines, so wall washers or LED strips can look striking. Plan any wiring before the panels go up, and use a qualified electrician for new circuits or for moving sockets and switches.
Consider the acoustics. Many slatted systems combine slats with an absorbent backing, which can help reduce echo. In general, the wider the gaps between slats, the more sound can reach the absorbent material behind them. If acoustic performance is a priority, ask the manufacturer for tested data rather than relying on appearance alone.
Finally, check your work in natural light. Small inconsistencies in spacing are far easier to spot and correct during installation than after the last panel is fixed.
Common Mistakes to Avoid
The most common error is rushing the first panel. If it is even slightly out of plumb, every slat that follows will be off too, and the problem becomes more obvious the further you go. Closely related is assuming the wall, floor or ceiling is straight. They rarely are, especially in older properties, so always work from a level line rather than following existing surfaces.
Using the wrong fixings is another frequent problem. Plasterboard, masonry and timber each need different fixings, and unsuitable plugs or screws can allow panels to work loose over time. Similarly, fixing methods, spacing and adhesive requirements vary between products, so ignoring the manufacturer’s instructions can affect performance and may invalidate any warranty.
In commercial settings, never cut or modify fire-rated panels without checking first. Altering a tested system can compromise its fire classification and create compliance problems at sign-off. Finally, think about future access. Covering a wall with no thought for the services behind it can make maintenance difficult, so where access is needed, choose a system that allows removable or demountable panels.