This post was sponsored in part by Stencil Revolution, which provided me with the stencil for this project. This post contains Amazon affiliate links.
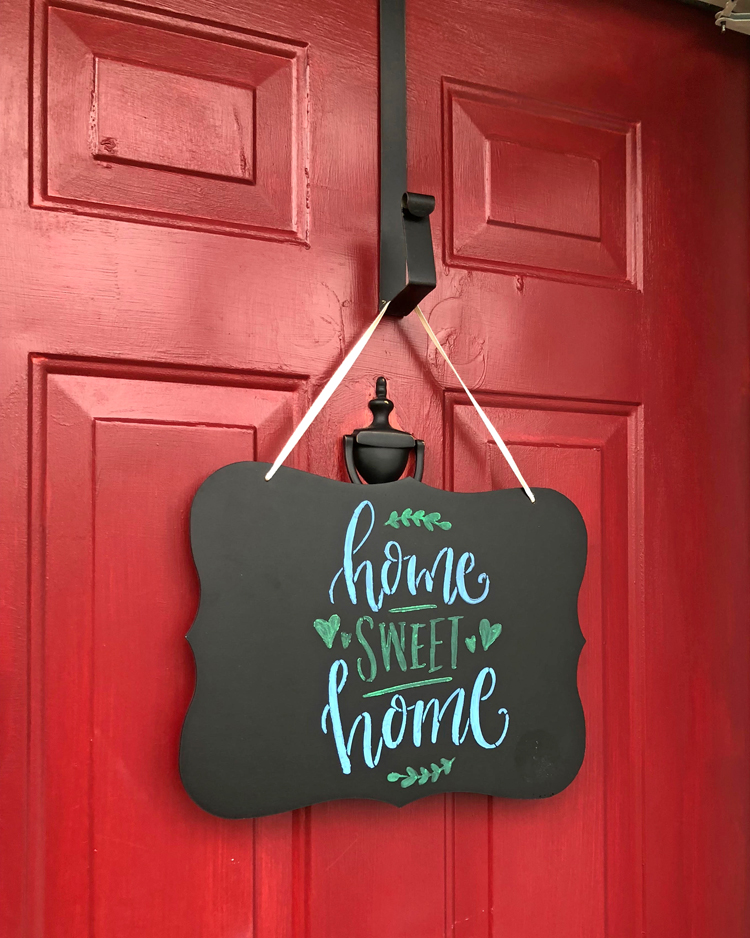
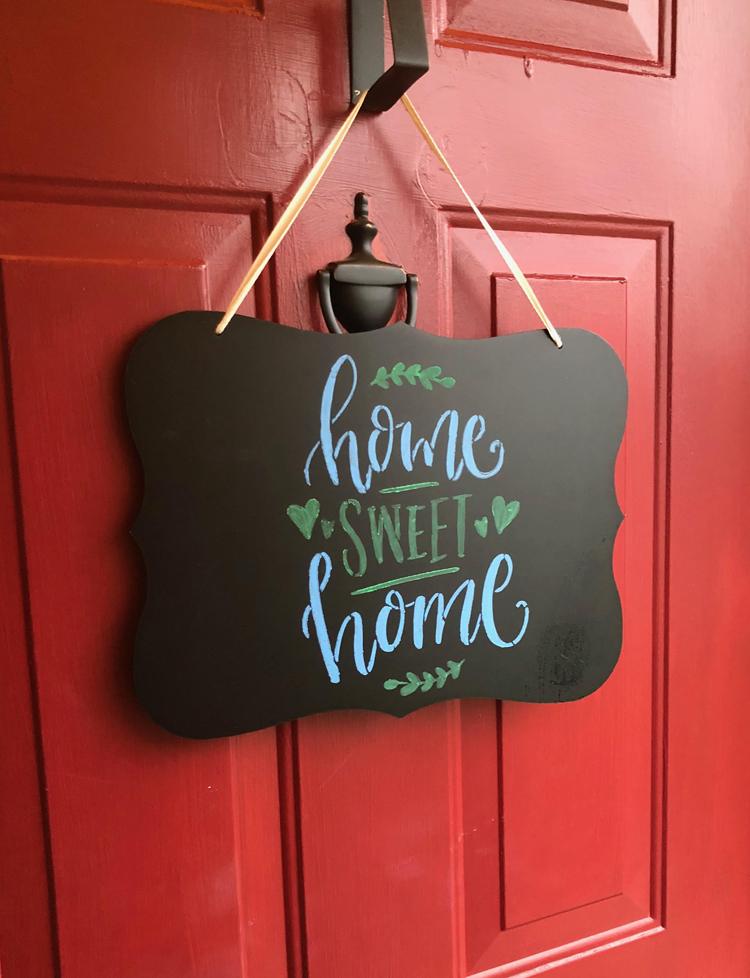
Hi, everyone! Today I’m sharing a quick DIY chalkboard sign that I put together Monday. I was able to put this sign together in less than 20 minutes! All I needed for my sign was a hanging chalkboard, some lliquid chalk markers![]() and a fun stencil. What I love about my sign is that because I used liquid chalk markers to create my sign, I can easily wash the message off my sign and create a new one whenever I want!
and a fun stencil. What I love about my sign is that because I used liquid chalk markers to create my sign, I can easily wash the message off my sign and create a new one whenever I want!
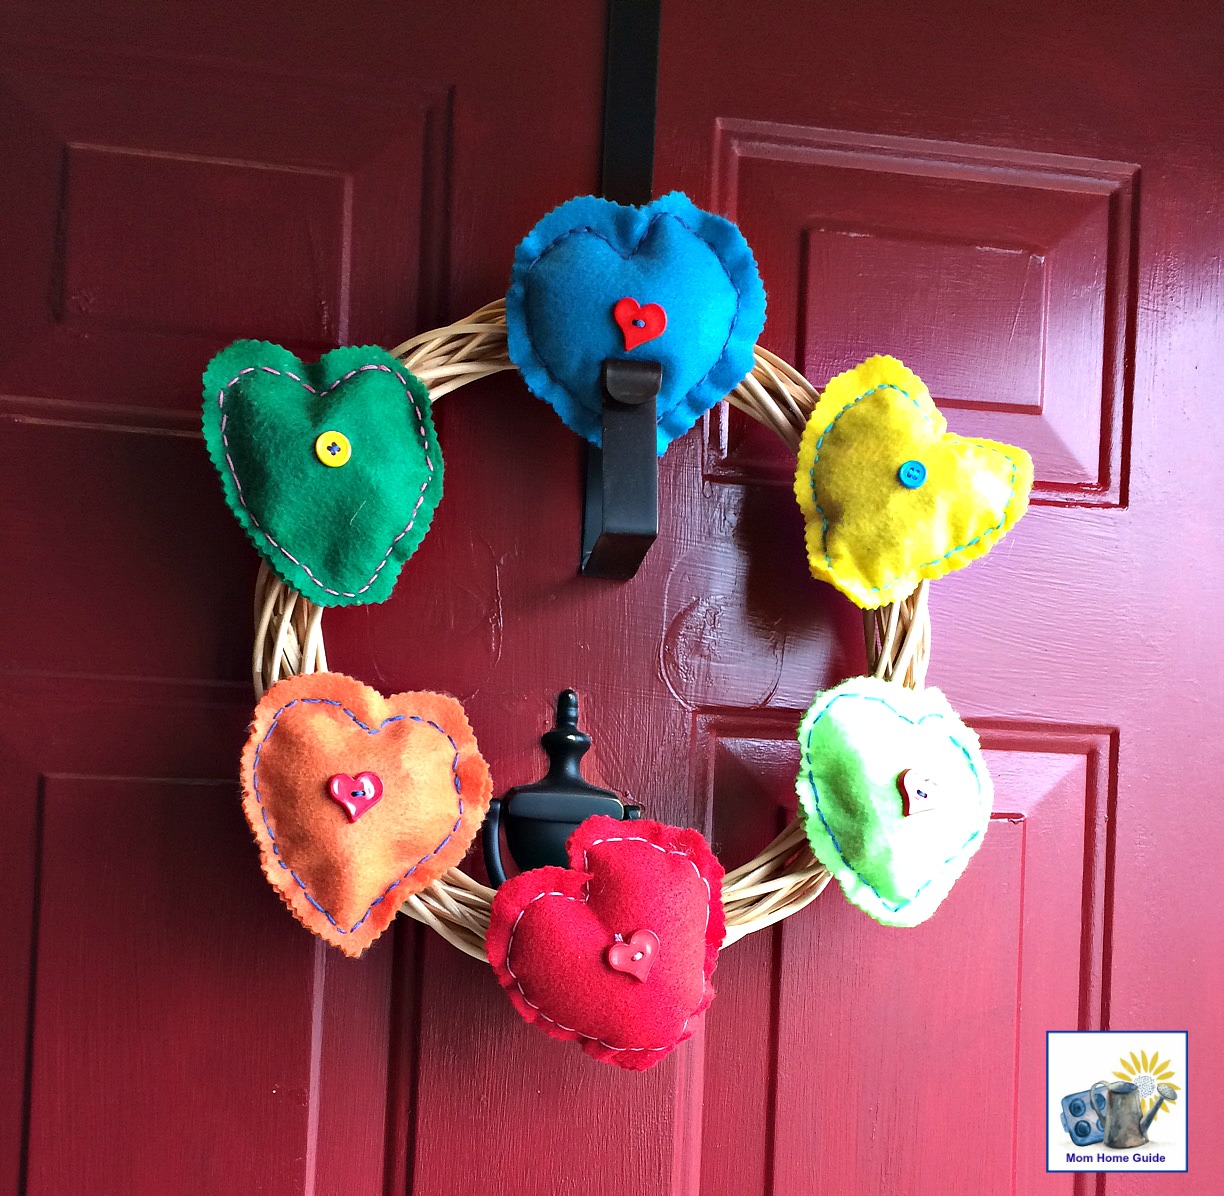
If you follow my blog, you know that I love to make wreaths and decor for my home’s front door. The problem is that all those wreaths and decor can pile up after a while! I’m glad I came up with this project. My sign can be made with a simple hanging chalkboard and some liquid chalk markers![]() . The chalk markers wash off easily, so I can change my chalkboard sign as often as I like. (Luckily, my front door is protected by a storm door. This sort of sign wouldn’t last as long if hung directly outside.)
. The chalk markers wash off easily, so I can change my chalkboard sign as often as I like. (Luckily, my front door is protected by a storm door. This sort of sign wouldn’t last as long if hung directly outside.)
Easy Chalkboard Sign
For my easy and quick DIY chalkboard front door decor, I used a “Home Sweet Home” stencil from Stencil Revolution. Stencil Revolution asked me if I’d like to try out a stencil, and after checking out their site of awesome stencils, of course I said yes! Stencil Revolution is a small family-owned company based in Florida. You can tell that they put a lot of care into making their stencils for their customers. They personally cut, pack and ship each stencil! I picked out this Home Sweet Home stencil to try out, but they also sent me some of their other stencils. (Be on the lookout for more projects with those stencils.)
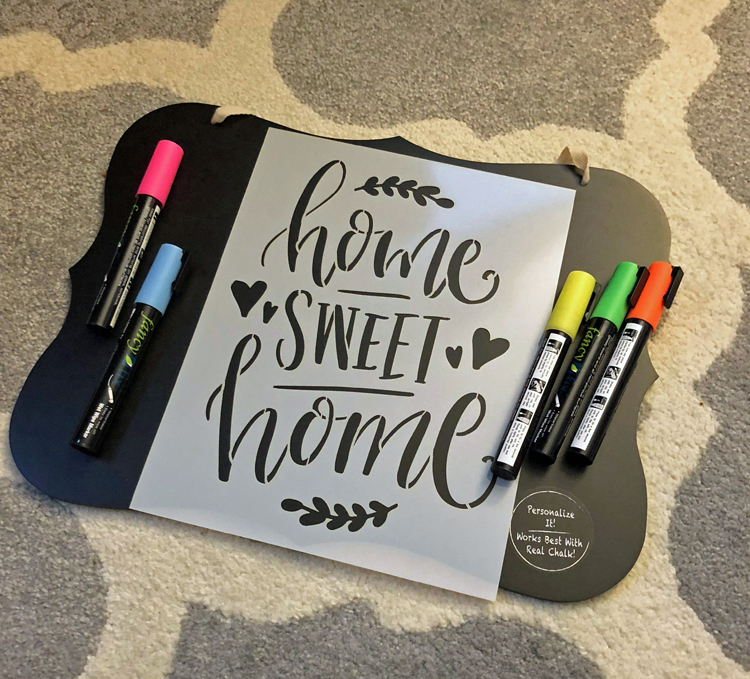
The stencils are really sturdy. My stencil worked perfectly for my project. I literally stenciled my sign quickly, in about 10 minutes or so. And even with working so quickly, I think the lettering came out perfectly with no bleed through. It was also very easy to wash the liquid chalk off my stencil. I am really happy with how my sign turned out!
Chalkboard Sign Materials
Home Sweet Home Stencil from Stencil Revolution
How to Make a Chalkboard Sign
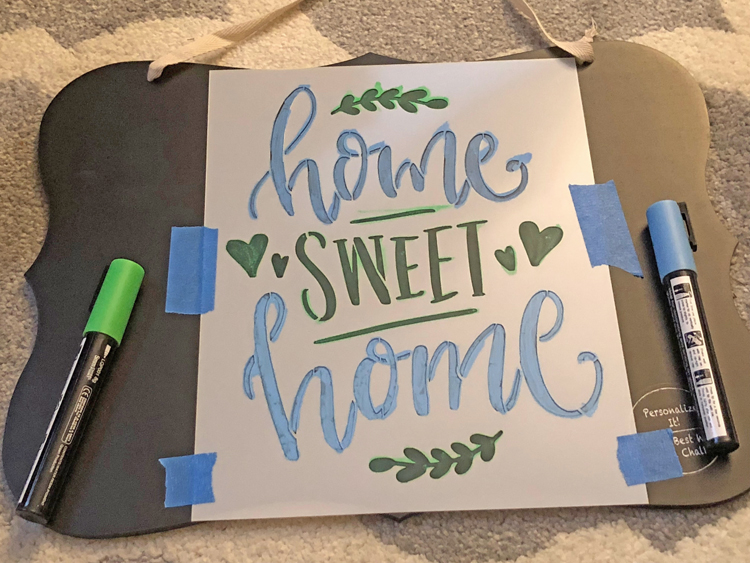
This project is so easy, you almost don’t need instructions. For my sign, all I did was pick out an inexpensive hanging chalkboard. (I found the chalkboard in the dollar section of one of my favorite stores.) I taped my stencil to the sign to keep it steady while stenciling. I then simply filled the stencil in with my liquid chalk markers. I gently pulled up the painter’s tape, lifted up the stencil, and I was done!
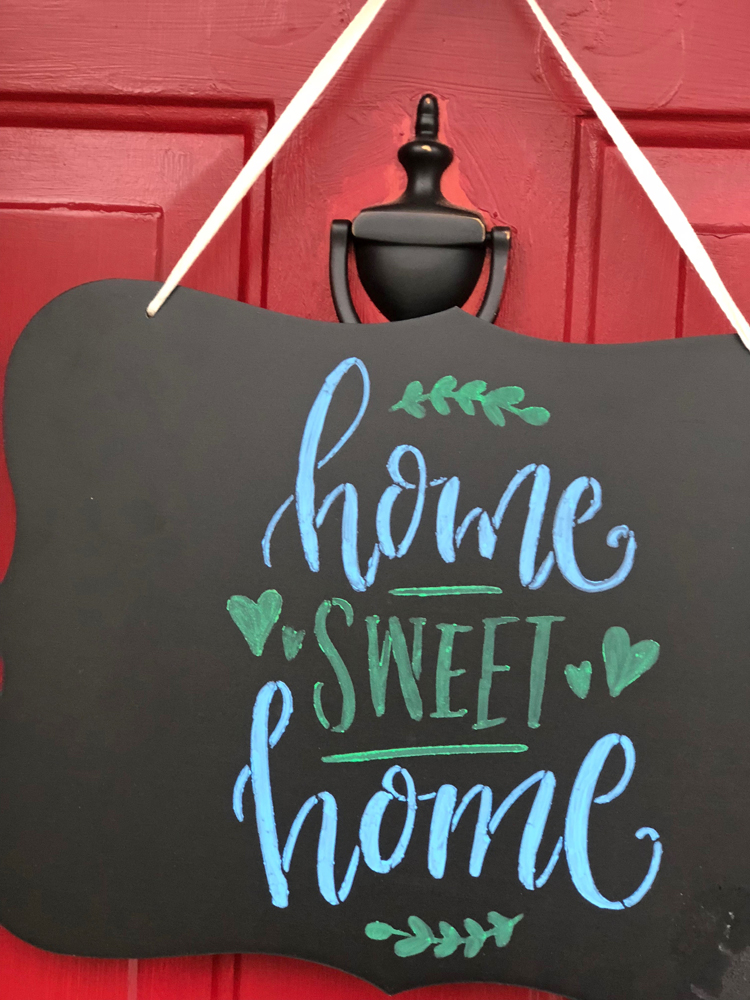
I was going to use more colors in my sign, but not all of the chalkboard marker colors shollowwed up well against the black chalkboard. But that’s OK — I like how the blue and green look together. I also like how the colors pop against the bright red door.
I’m looking forward to updating my new chalkboard door decor/sign throughout the seasons. With my beautiful stencil from Stencil Revolution, my chalkboard door sign project was a simple and very rewarding one! I’ll have to check Stencil Revolution’s shop for other stencils to use on my new hanging chalkboard sign for my front door.
This tutorial has been shared at the Homestyle Gathering party at My Wee Abode.