This post contains Amazon affiliate links. 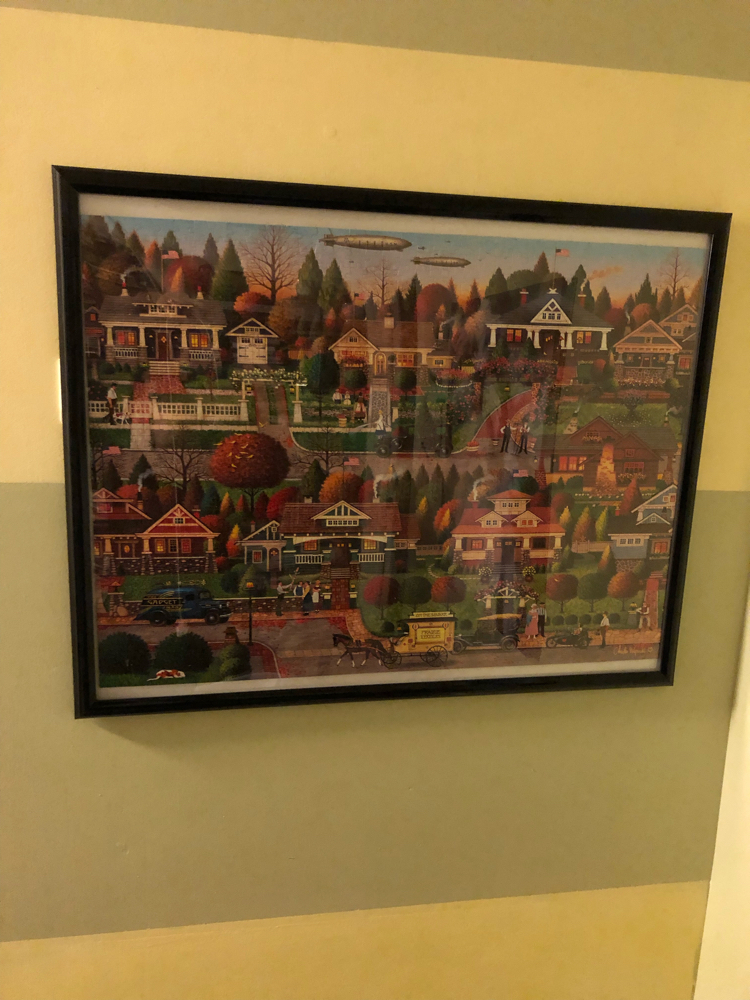
Welcome to the March Pinterest Challenge Blog Hop. The purpose of this Pinterest Challenge is to motivate all the participants of this hop (and you too) to not just pin, but to make it happen! This month, I chose to Mod Podge and frame a 1,000-piece jigsaw puzzle that my daughters completed together. The puzzle sat on our big farmhouse kitchen table for a while. I had to figure out how to glue and frame the puzzle, and I also fought off an awful cold virus!

Once I was healthy again, it was time to tackle that puzzle! My inspiration for how to tackle this project was the puzzle tutorial from Forever in the Making.
How to Mod Podge and Frame a Jigsaw Puzzle
Celia from Forever in the Making had the luck that she decided to make her puzzle on a piece of poster board. That way, she could protect her table from the Mod Podge when it came time to glue the puzzle together. But, my daughters put their puzzle together directly on the kitchen table, so I needed a different way of protecting the table. So, I carefully slipped wax paper underneath the puzzle before gluing it together.
Materials
Command 3M Picture Frame Hangers (for hanging)
Instructions
The puzzle my daughters used is the beautiful Buffalo Games – Charles Wysocki – Labor Day in Bungalowville .
The beautiful image on the puzzle is by Charles Wysocki. Buffalo Puzzles has several gorgeous Charles Wysocki puzzles.
My daughters and I are very impressed by the Buffalo Puzzles brand. When my daughters completed their 1,000-piece puzzle, they discovered that one puzzle piece was missing. I emailed Buffalo Puzzles, and they quickly sent me another copy of the entire puzzle so my daughters could insert the missing piece in their completed puzzle.
Gluing a Jigsaw Puzzle
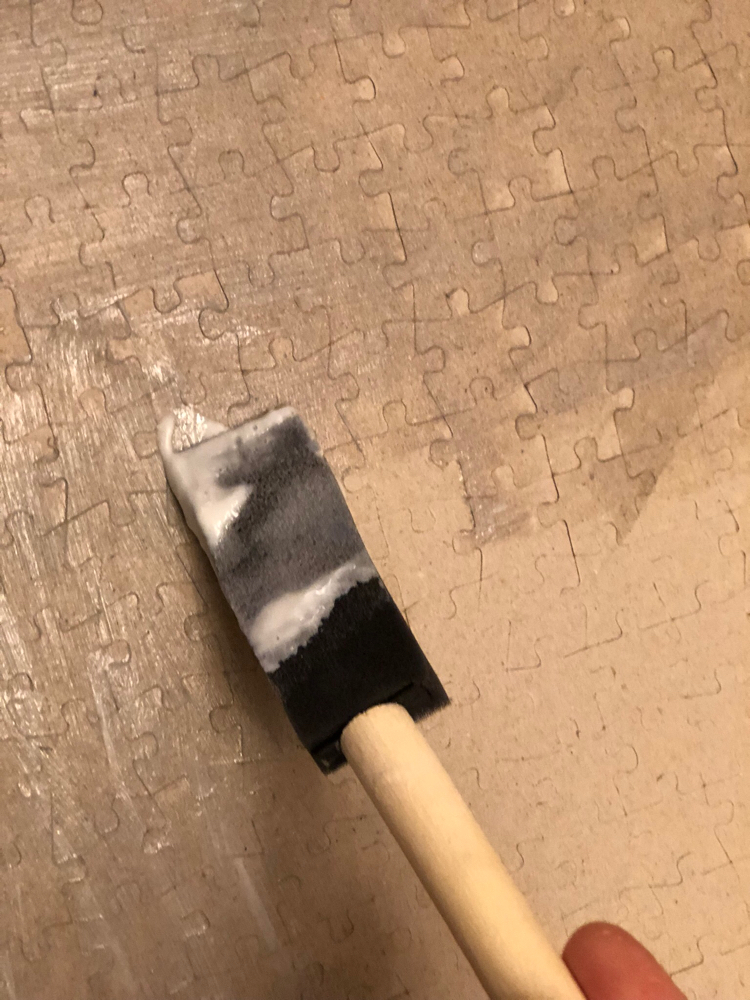
To get started, I slipped wax paper under the completed puzzle before gluing it together. To start the gluing process, I swept a layer of Mod Podge across the top of the puzzle with a foam brush.

I then left the puzzle to dry for about 2-3 hours. Don’t panic when you apply the Mod Podge — it leaves a white film when wet, but dries clear.

Once the Mod Podge was dry, I flipped the puzzle over and applied a layer of Mod Podge to the back of the puzzle.
I found a poster frame at a nearby store that was just a little bit larger than my puzzle.

To insert the puzzle, I carefully removed the back of the poster frame. I then placed the puzzle in the frame with the top of the puzzle against the clear surface of the front of the frame.
I flipped over the image of the skyscrapers that was in the frame and put the clean white side of the paper against the back of the puzzle. I did this so the insert would act like a matte of sorts for the puzzle.
Then, all that was left to do was add the back of the frame and secure it with the metal tabs on the frame.
It only took me about 10 minutes to frame the puzzle. I used two pairs of Command Strips (one on either side of the back of the puzzle) to hang the puzzle. I’m glad to finally have the puzzle off my kitchen table and up on the wall! My daughters are pleased, too.

To join next month’s #pinterestchallenge, click here to sign-up: April Pinterest Challenge
Let’s meet this month’s Pinterest Challenge hosts!
Erlene – My Pinterventures • Jenny – Cookies Coffee and Crafts Debbee – Debbee’s Buzz • Lynne – My Family Thyme • Pili – My Sweet Things Bri – Halfpint Design • Julie – Sum of their Stories Erin – The DIY Nuts • T’onna – Sew Crafty Crochet Beverly – Across the Boulevard • Kristie – Love My Little Cottage Roseann – This Autoimmune Life • Terri – Our Good Life Ali – Home Crafts by Ali • Cherryl – Farm Girl Reformed Leslie – Once Upon a Time & Happily Ever After • Kelli – K’s Olympic Nest Lauren – Mom Home Guide • Joanne – Our Unschooling Journey Shirley – Intelligent Domestications • Gail – Purple Hues and Me Audra – Renewed Projects • Habiba – Craftify My Love Kristie – Teadoddles • Marie – The Inspiration Vault • Susan – Suzerspace Lydia – Lydia’s Flexitarian Kitchen • Maria – Simple Nature Decor Sam – Raggedy Bits • Emily – Domestic Deadline • Marci – Stone Cottage Adeventures Alexandra – Eye Love Knots • Alayna – Alayna’s Creations Terrie – Decorate and More with Tip
Find the hosts’ Pinterest Challenge Inspired Projects below.
UPDATE: My daughters have recently completed another puzzle, and I used this technique to frame that puzzle, too!
Don’t have Mod Podge/glue or a poster frame? Check out this tutorial on how to preserve a jigsaw puzzle with duct tape and how to hang it with Command Strips.
You Might Also Like
How to Save & Hang a Jigsaw Puzzle Without a Frame
Beginner Paint by Numbers Tips & Tricks
Discover more from momhomeguide.com
Subscribe to get the latest posts sent to your email.

Great job! I have done a few puzzles in my time that I would have liked to frame. Now I know how!
Hi! Just stopped by your blog. I love your beautiful Easter eggs. Pinned!
I love jigsaw puzzles too! I need a fresh, spring scene puzzle. Thanks for the tip regarding Buffalo Puzzles.
We do puzzles a lot at our house. My daughter has asked about framing one, and now I know how! Mod Podge is such a lifesaver sometimes!
We’ve glued and framed a puzzle, too. After all that work to piece together its a shame to crumble it up and box it. Great tutorial!
Lauren, with this post you’re bringing back childhood memories. Thank you for that! My best friend from first grade to middle school used to make these ginormous jigsaw puzzles with her family and they always made sure to glue and frame them. Now, I am fairly sure we didn’t have Mod Podge back then, and I don’t know how they made it happen, but now I know how to do it today. Thank you for sharing.
That is a beautiful puzzle! I am just amazed that you were able to slip waxed paper under it without it falling apart!
Thanks, Roseann! I’m surprised I was able to glue and move the puzzle without breaking it, too!
Modge podge is such awesome stuff, so many great uses for it! Turned out great
Thanks, Emily! Thanks for stopping by!