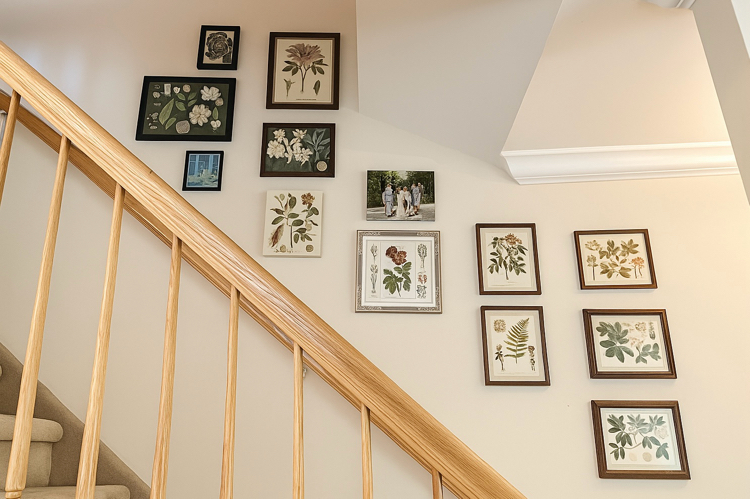
As summer winds down, I finally completed a do-it-yourself project I started at the beginning of the season—a DIY staircase gallery wall. I had a photo wall of sorts there before, but everything was hung a bit haphazardly. This time, I took careful measurements and used my new Cigman CM-S02 Laser Level to get everything straight and looking nice! I think it came out looking great!
I just used frames I already had for my gallery wall, but if you put a photo wall together, you might want to think about the kind of frames you choose. You could choose matching wood-toned ones or all black or white ones, for instance, or pick a colorful combination of frames.
My frames hold my family’s portraits—but because my husband and kids don’t like sharing that kind of personal stuff online, for this blog post, the frames mostly contain botanical prints. I think the wall looks great both ways—with the flowery prints and with my family’s photos! I have been wanting to do this project for so long. I was just waiting until I could get a laser level to help me hang all the framed photos properly! I am proud of myself for finally completing a project that I have wanted to do for so many years!
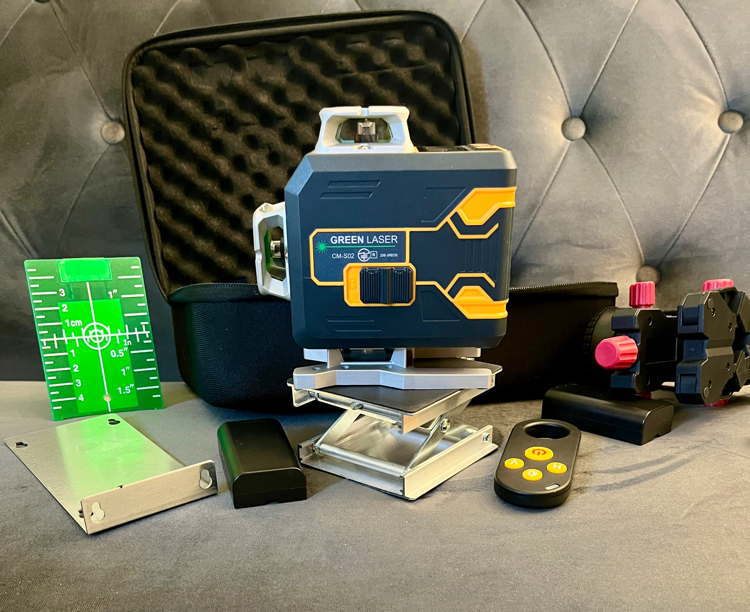
My Cigman laser level, which has a very handy 4×360° Green Cross Line Laser, includes lots of accessories. Included are two chargeable lithium batteries, a charging cable (without plug), a multi-functional magnetic mount (with metal plates), a lifting base, a target plate, and a remote control. This full laser level kit includes everything I needed for my project. I love that it also includes a very sturdy case with lots of padding to protect the laser level and its accessories.
I found that the laser is quite sturdy and very beginner friendly. I have never used one before and got the hang of it fairly quickly. Now that I know how to use it, I plan to rearrange other gallery walls I have in my home so everything will look neat and orderly! My new laser level has become a favorite tool in my DIY toolbox.

How to create a gallery wall
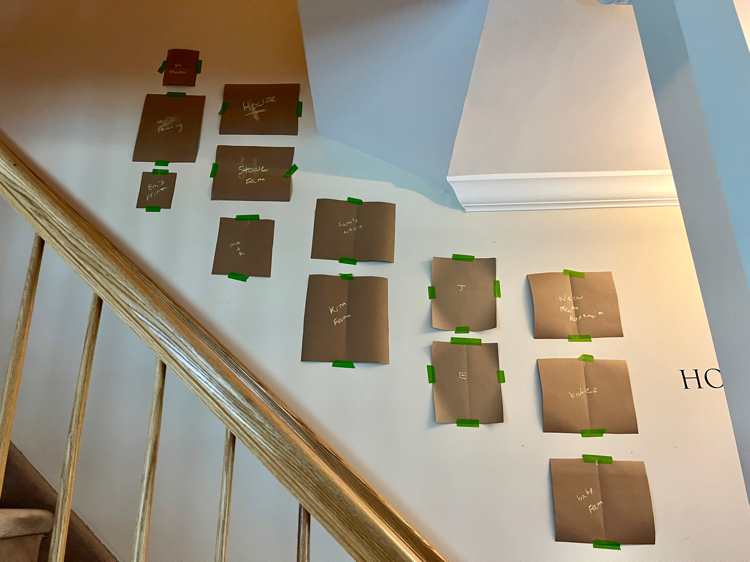
To create my gallery wall, I first decided how many pictures I wanted to include and sketched out different arrangements until I found one I liked. Then, I cut a kraft paper template for each frame, making sure to make each template the same size as the frame it represented. After measuring the wall space I planned to use, I experimented with the templates in a similarly sized area on my home’s living-room floor. I knew I wanted five columns, so I arranged the paper pieces accordingly, adjusting them until I was happy with the layout. I also took into consideration the railing on the wall, making sure that that lowest frames would be a few inches above that railing so they won’t get accidentally knocked down when my family uses the stairs.
Using a yardstick, I measured the spacing between each column and row, snapped a photo of the final combination and noted the measurements for reference. Finally, it was time to tape the templates to the wall with my favorite green painter’s tape.
I used my new Cigman laser level to help me line up my placement of the templates. After I had everything taped to the wall and lined up properly, I marked on each template where I wanted the nails to support each frame to go. it was important to put the nails in the same relative locatoin for each frame so each picture would line up as I planned in my final layout. Using the laser level helped me to ensure that everything would be orderly and symmetrical.
I got a set of gold-toned picture-hanging hardware and added a D ring on either side of the back of each picture frame and strung a length of picture wire between each. I found that hanging photos this way is more forgiving than just hanging a frame from a center hook on the frame—this way, if my placement of a nail is slightly off, I can slide the frame along the wire until it’s hanging in the exact spot I want.
From Amazon, I also purchased a set of rose-gold finishing nails for hanging the frames. I also used Tac ‘N Stick reusable adhesive to keep the frames hanging straight—I am pretty sure that the wall by our staircase is crooked because the frames always wanted to hang at an angle! I simply placed some Tac ‘N Stick in the corners of my frames and then pressed them against the wall so they will hang straight vertically.
I used a multifunctional stud finder to find studs as well as any electrical wires behind the wall, as I didn’t want to damage them . The red electrical warning light went off for my last two columns of framed photos, so instead of taking a chance by using nails in those locations, I used medium 10 lb. medium picture hanging strips by Command to hang those frames—for extra security, I used two sets of strips on the left and back sides of the frames. That’s even though I’ve used Command Strips many times in my home, and I have big framed portraits (namely my kids’ baby and one-year-old photos) that have been up on the wall for years now with Command Strips; I just want to be extra sure the frames won’t eventually fall down. (I have noticed that Command Strips don’t work as well in very humid conditions, such as in a bathroom.)
I am really happy with how my gallery wall turned out! Now that it’s complete, I want to add another family photo wall to my home’s upstairs hallway, as well as rearrange a mini photo wall I have up in my living room—using my new Cigman level, I can get much cleaner layouts now!
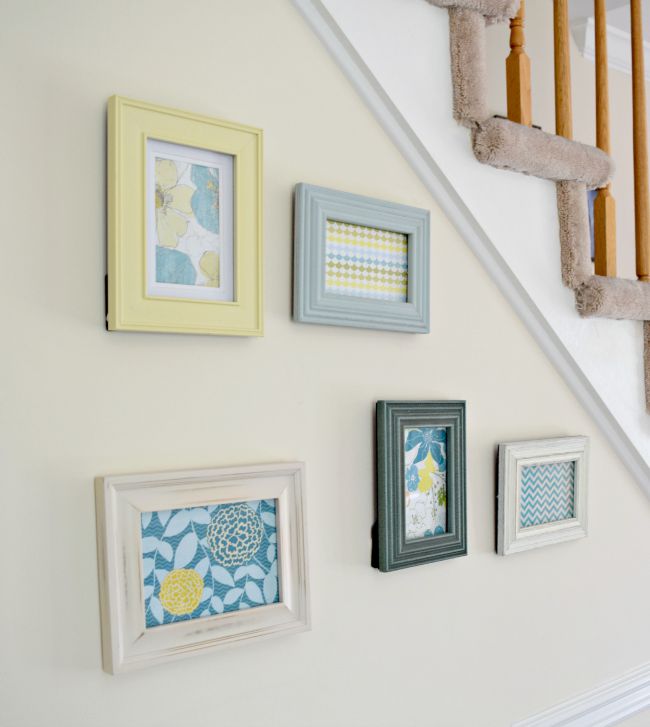
I think I will be re-arranging this framed scrapbook paper gallery wall next!
This post contains Amazon affiliate links—I may earn a small commission that helps to support this blog if you click on a link and make a purchase. Thanks!
You Might Also Like
How to Sew an Easy Envelope Pillow Cover


How to Create a Feature Wall with a Stencil

Discover more from momhomeguide.com
Subscribe to get the latest posts sent to your email.
[…] It’s comfortable enough, but it can also feel a bit uninspired. You don’t need to go as far as hanging a full gallery wall to make the space feel like yours—especially if that’s not allowed—but small, thoughtful […]